
Geotag Ricoh GR photos without Bluetooth location syncing
On this page
You can geotag your photos in GR Snap without automatically sending your iPhone’s location to the camera over Bluetooth. Set Auto Send to Camera to Never, let your iPhone record the route while you shoot, then download your photos. GR Snap uses their capture times to add missing locations from that route.
The key is the Never setting. The camera can keep Bluetooth enabled, and you can still use Bluetooth to connect when you want to download photos. GR Snap will not automatically sync locations to the camera while this setting is selected.
Avoiding automatic location syncing can help save camera battery. The saving depends on your camera, settings and shooting habits; your iPhone uses battery to record the route.
This guide covers GR Snap 1.4 on iOS 17 or later. Route recording works with the GR II, III, IIIx and IV.
1. Connect your camera once before using Geotagging
Before using this feature, you need to successfully connect your camera in GR Snap at least once. If you have already done so, move on to the next step.
Otherwise, tap Add New Camera and complete a connection using either Bluetooth or Wi-Fi. Either method works: this step simply lets GR Snap record your camera’s information so it can associate routes with the right camera.
You do not need to keep the camera connected while recording a route. If you use several cameras, make sure the camera you are taking out is selected before recording.
2. Set Geotagging to record routes only
Open Settings → Geotagging. If Auto Send to Camera is shown, set it to Never before turning Geotagging on. The description reads Records routes only.
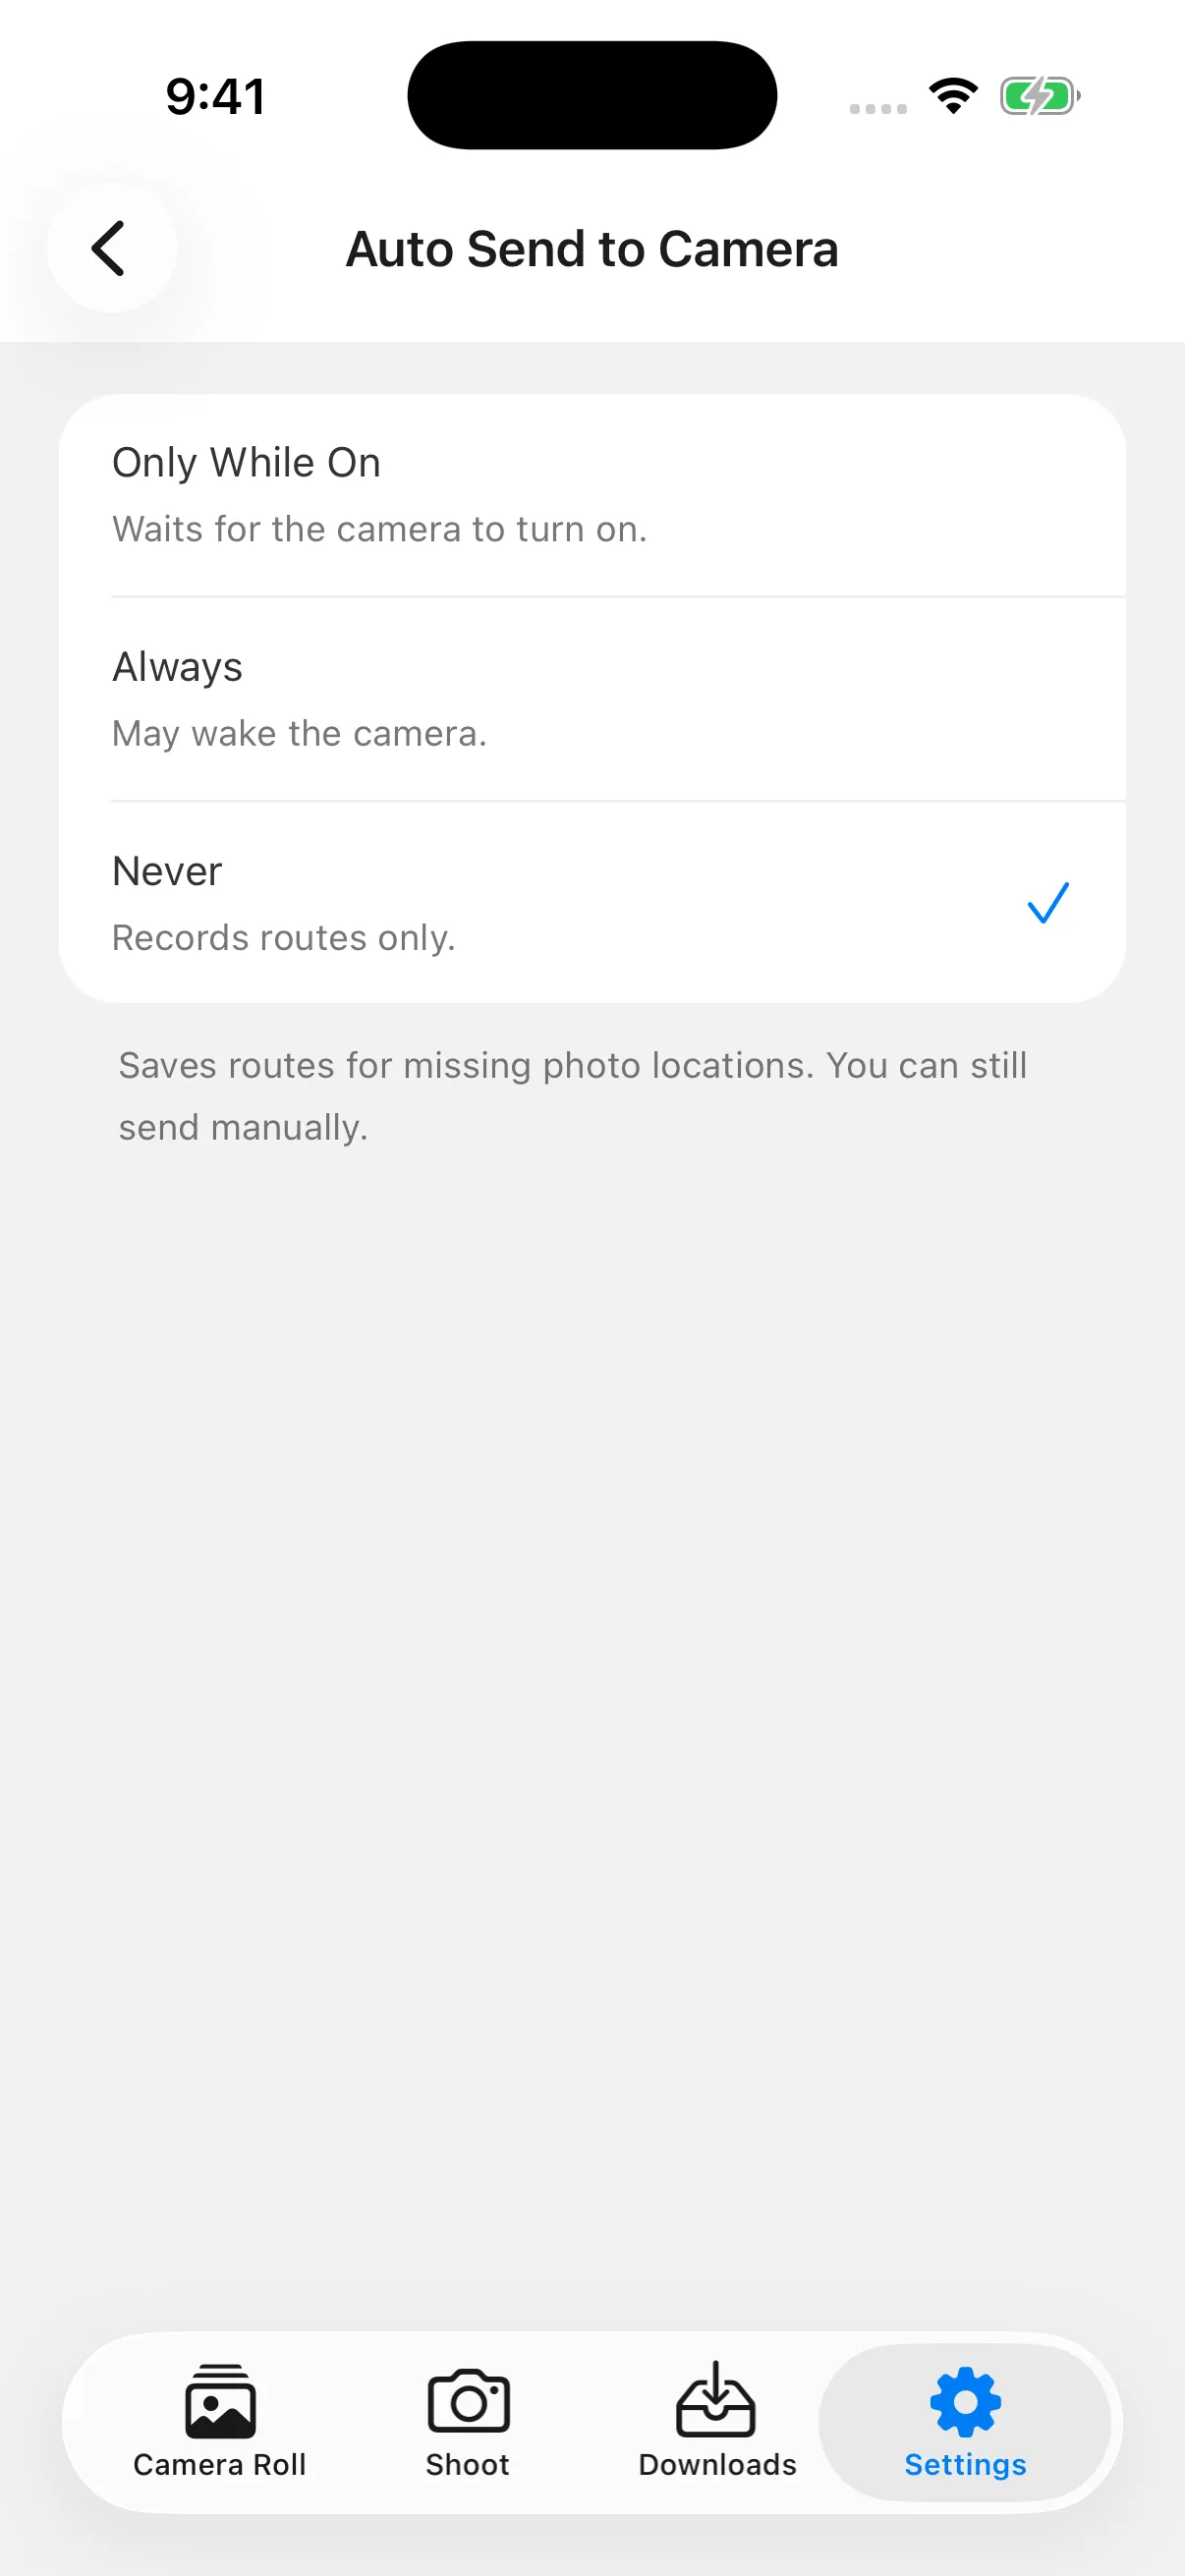
For a camera added only over Wi-Fi, the camera sending controls may be hidden. It already uses route recording, so you can skip that setting.
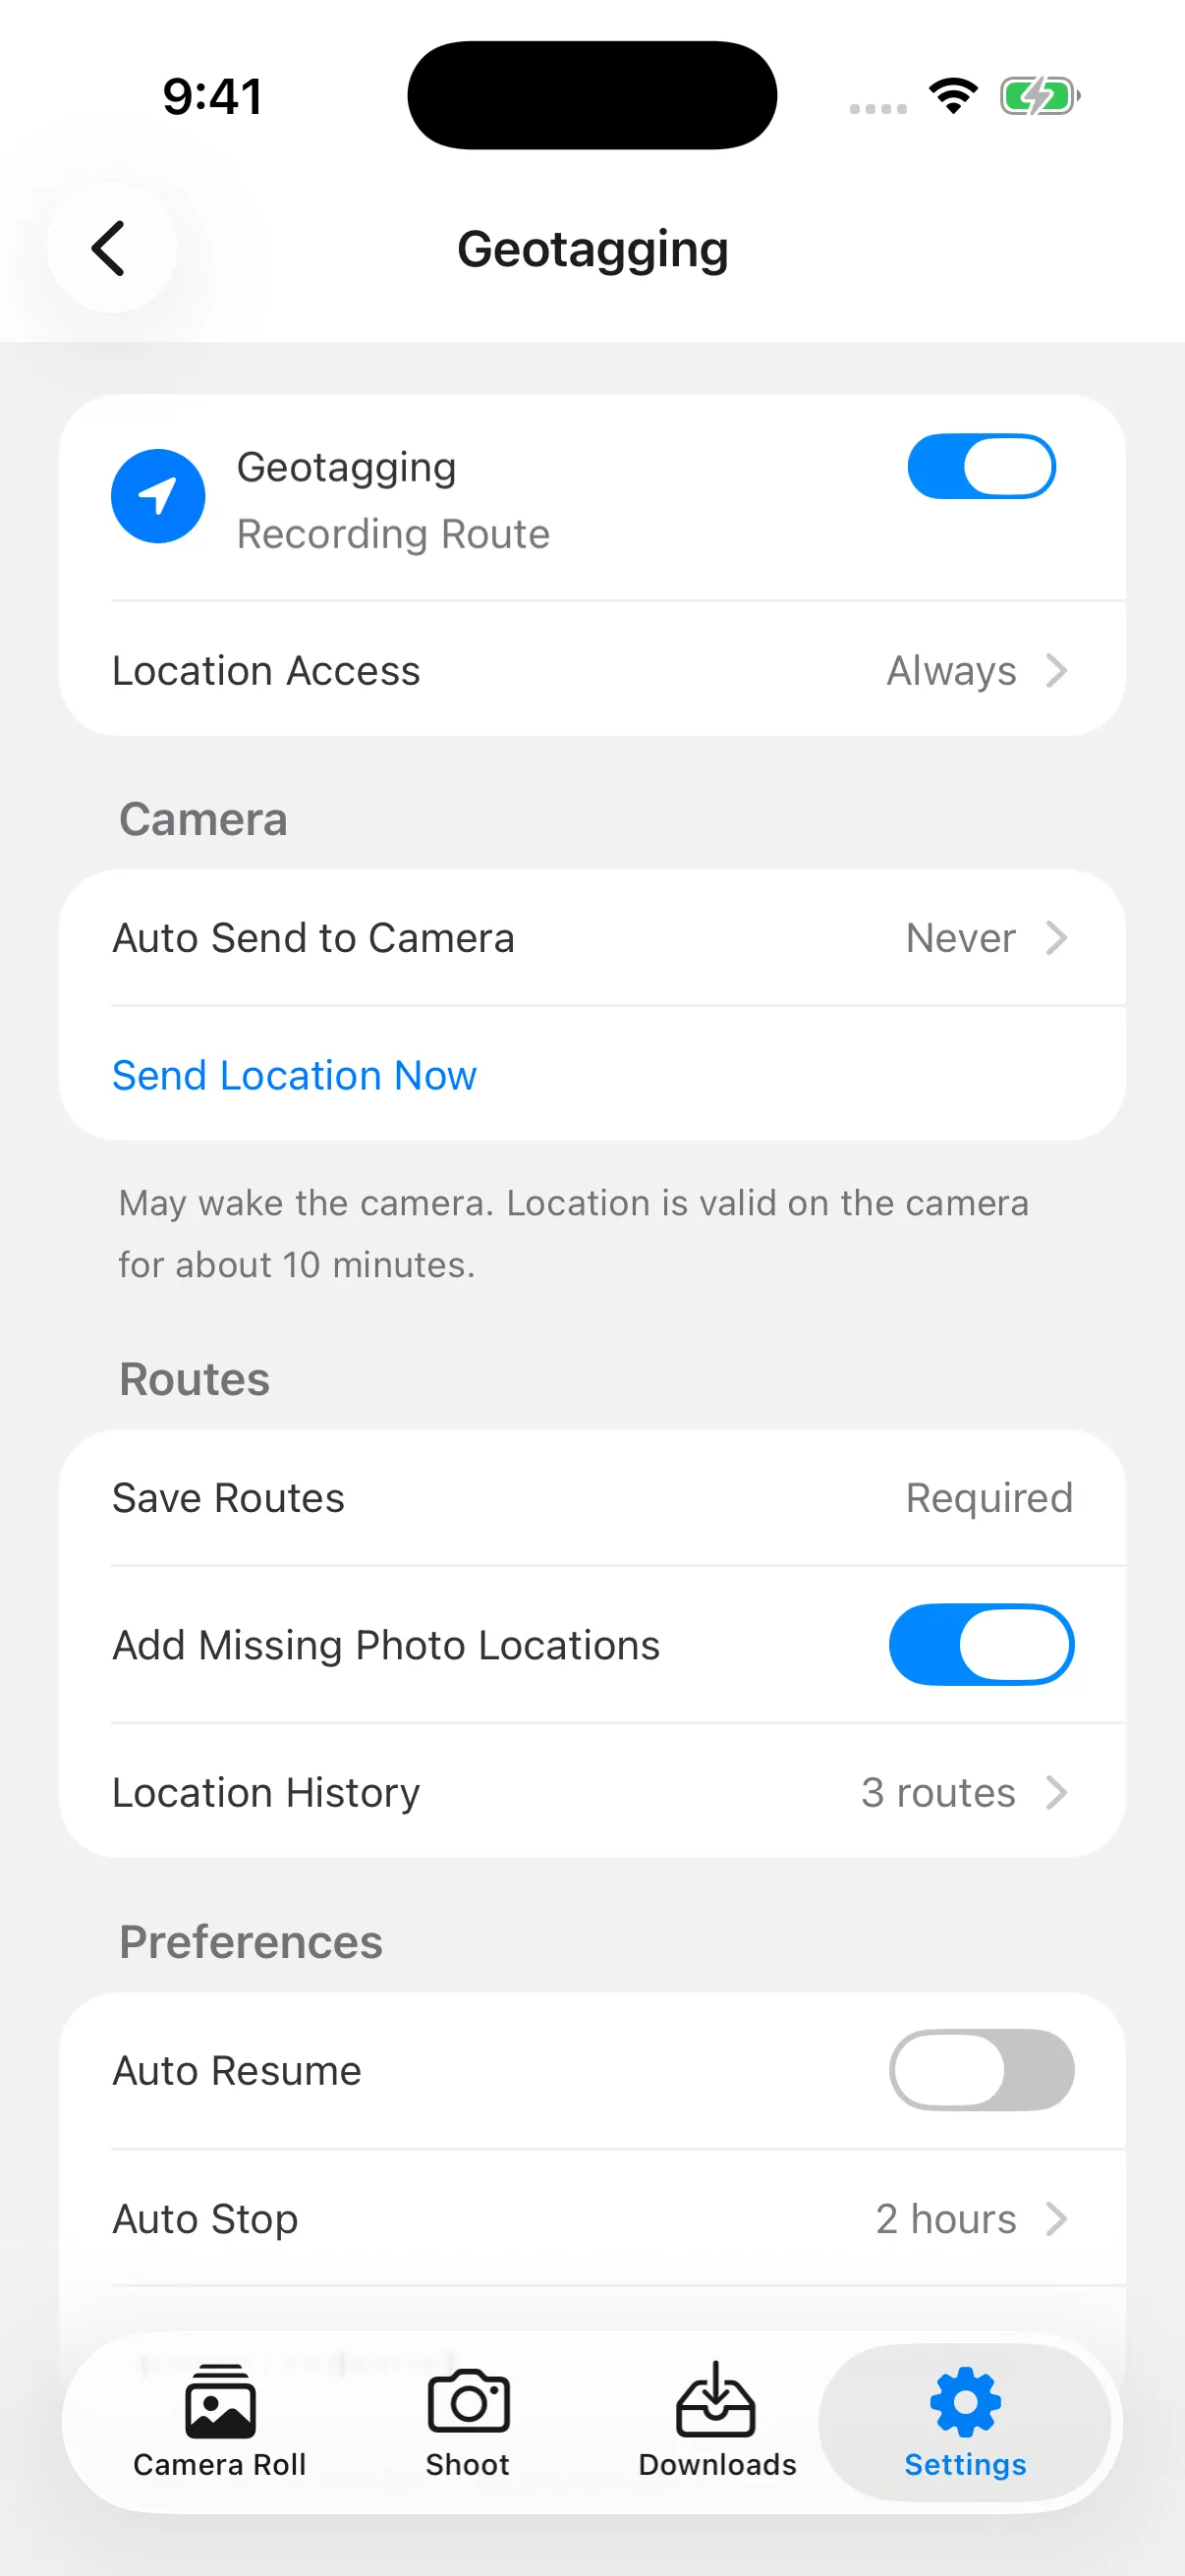
Turn on Geotagging, then check the two controls under Routes:
- Save Routes keeps the route on this iPhone. In this mode it may show Required instead of a switch.
- Add Missing Photo Locations should be on, so downloaded photos can receive locations from the route.
Send Location Now is a separate manual action that communicates with the camera and may wake it. You do not need it for this workflow.
3. Allow location access and check recording
Allow location access when prompted and enable Precise Location. While Using the App lets you start a recording that can continue after you switch apps or lock the phone. Always also supports automatic recovery in the background. You can review these permissions through Location Access.
Before taking your first photo, wait for Recording Route and open Location History to check that a route is being saved. Keep the iPhone with you: the route follows the phone’s position.
Check the camera’s date and time before the walk, especially after travelling across time zones. Matching depends on the photo’s capture time, so keep the camera clock accurate and avoid changing it during the shoot.
4. Shoot while your iPhone records the route
Leave Auto Send to Camera set to Never while you shoot. You can leave the camera’s Bluetooth enabled or turn off its wireless communication if you prefer. Route recording works either way, and GR Snap will not automatically send locations to the camera.
Shoot as usual, switching the camera on and off whenever you need. The iPhone can keep recording while the camera is off. Leave GR Snap running in the background rather than swiping it away from the app switcher.
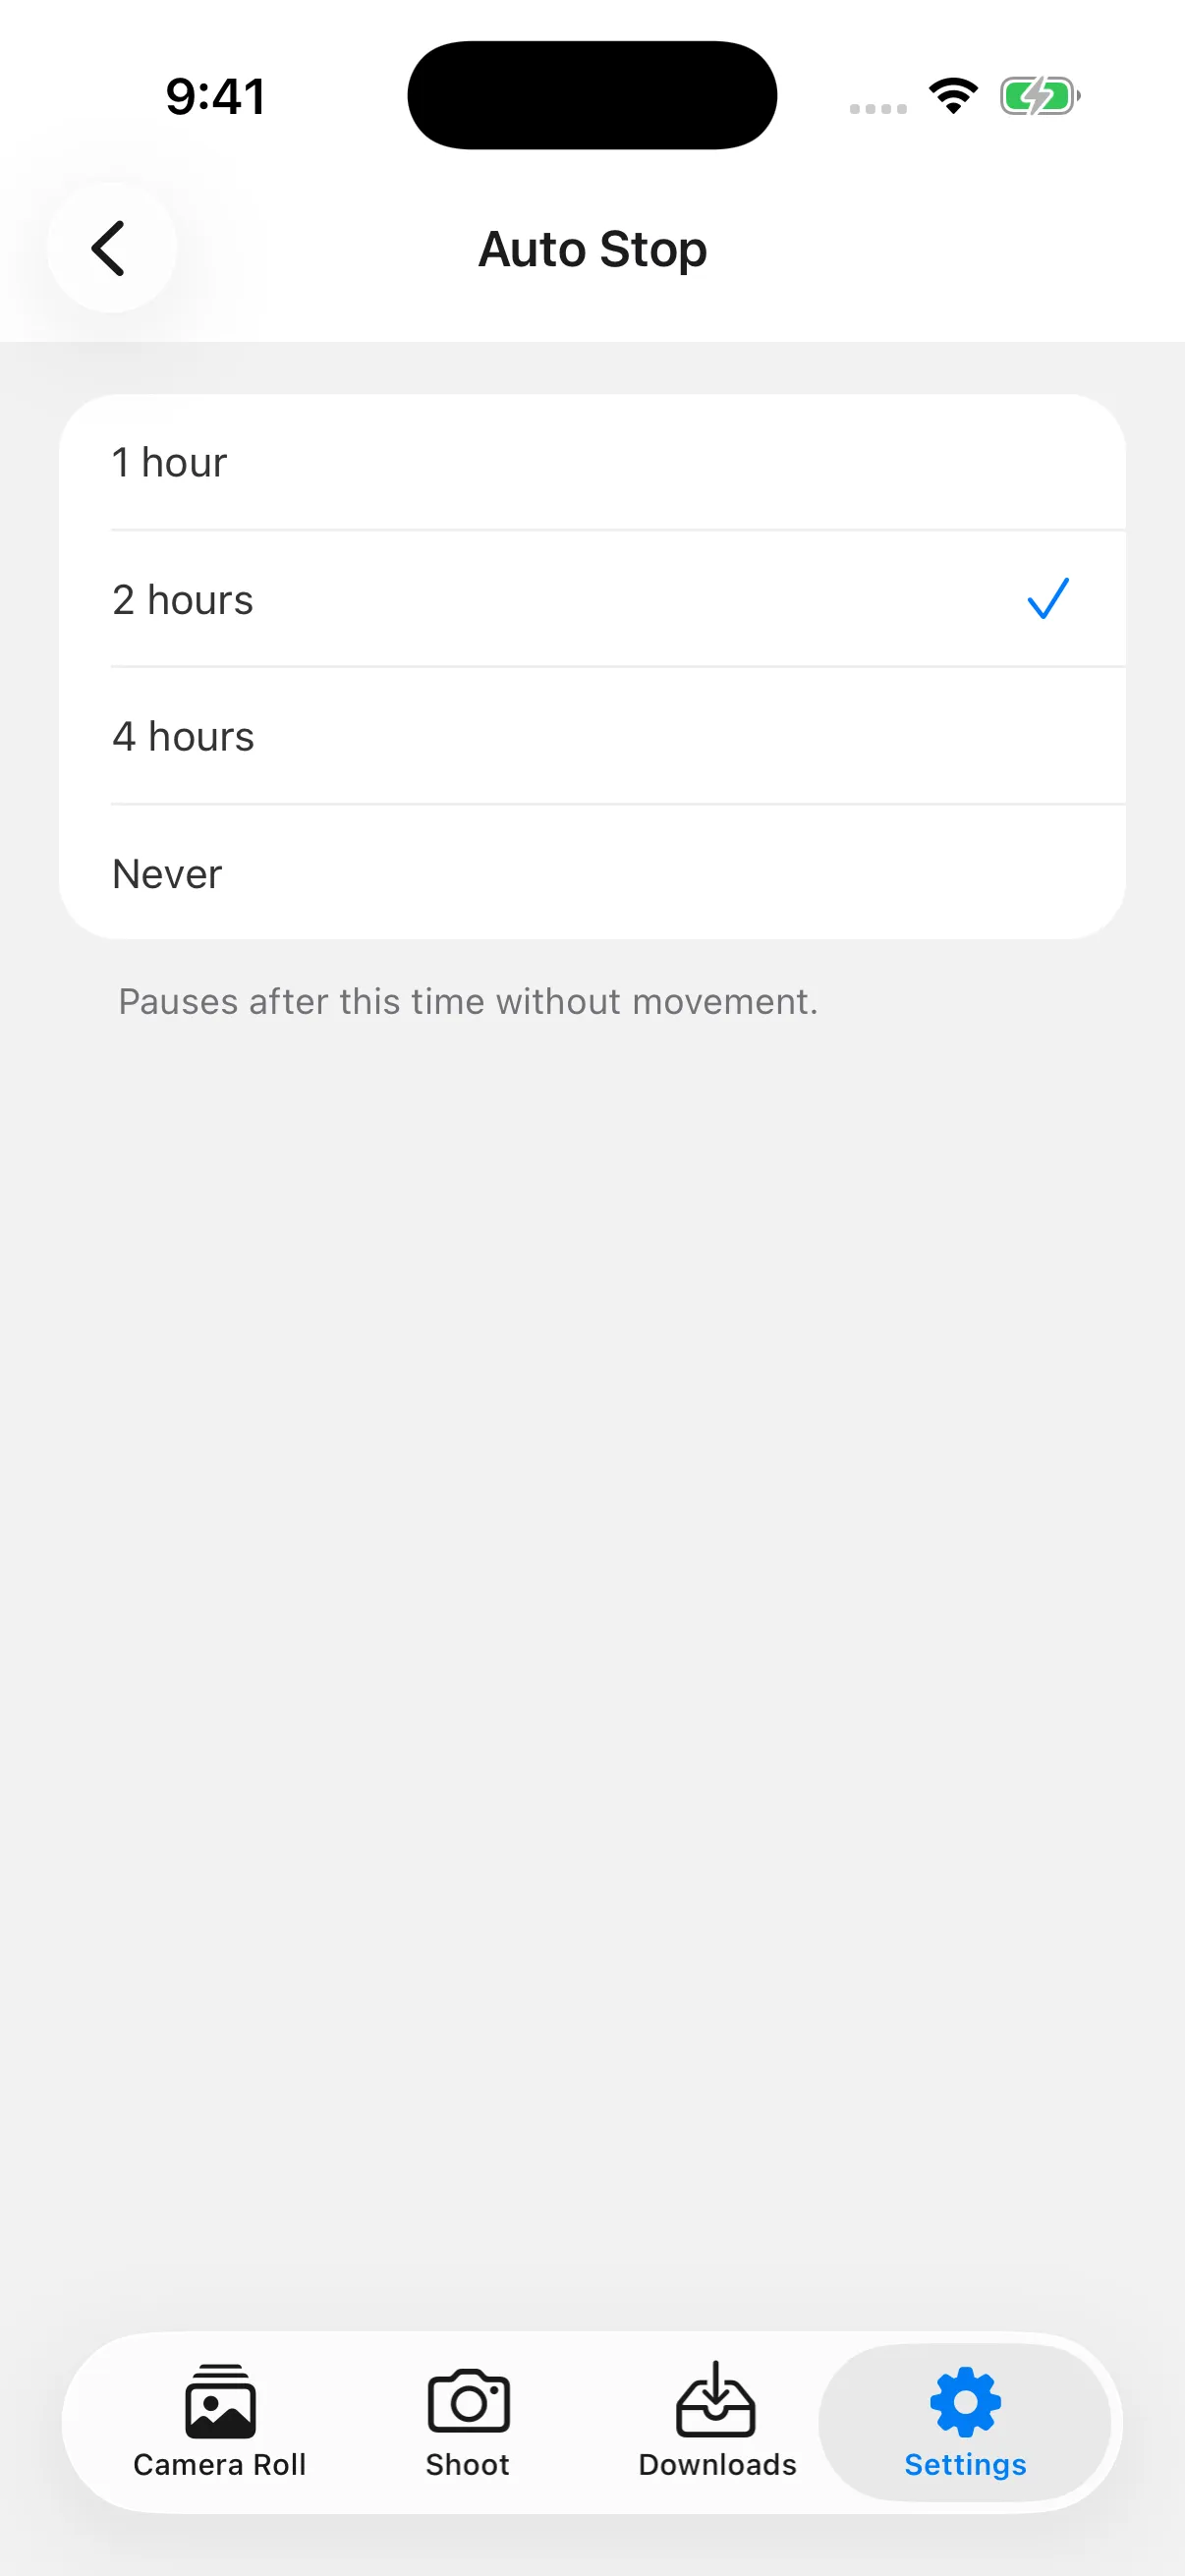
Check Auto Stop before a long session. When recording routes only, it pauses after the selected time without movement. If you will be photographing one place for hours, extend the interval or choose Never, then turn Geotagging off yourself when finished. Auto Resume can resume after you move again with Always location access; you can also tap Resume manually.
An active recording can be interrupted by location reception or iOS. After restarting the phone or noticing a pause, open GR Snap and check the recording status before continuing.
5. Download your photos and check the locations
When you are ready to import, turn on the camera, connect using your usual Bluetooth or Wi-Fi connection flow, and download the photos. Keep Auto Send to Camera set to Never: connecting through Bluetooth does not enable automatic location syncing. For connection details, see Transfer Ricoh GR photos to iPhone.
With Add Missing Photo Locations enabled, GR Snap matches downloaded photos without a location to the saved route for that camera. A successful match adds a location in GR Snap’s Library and, when Photos access allows editing that item, to its copy in Apple Photos.
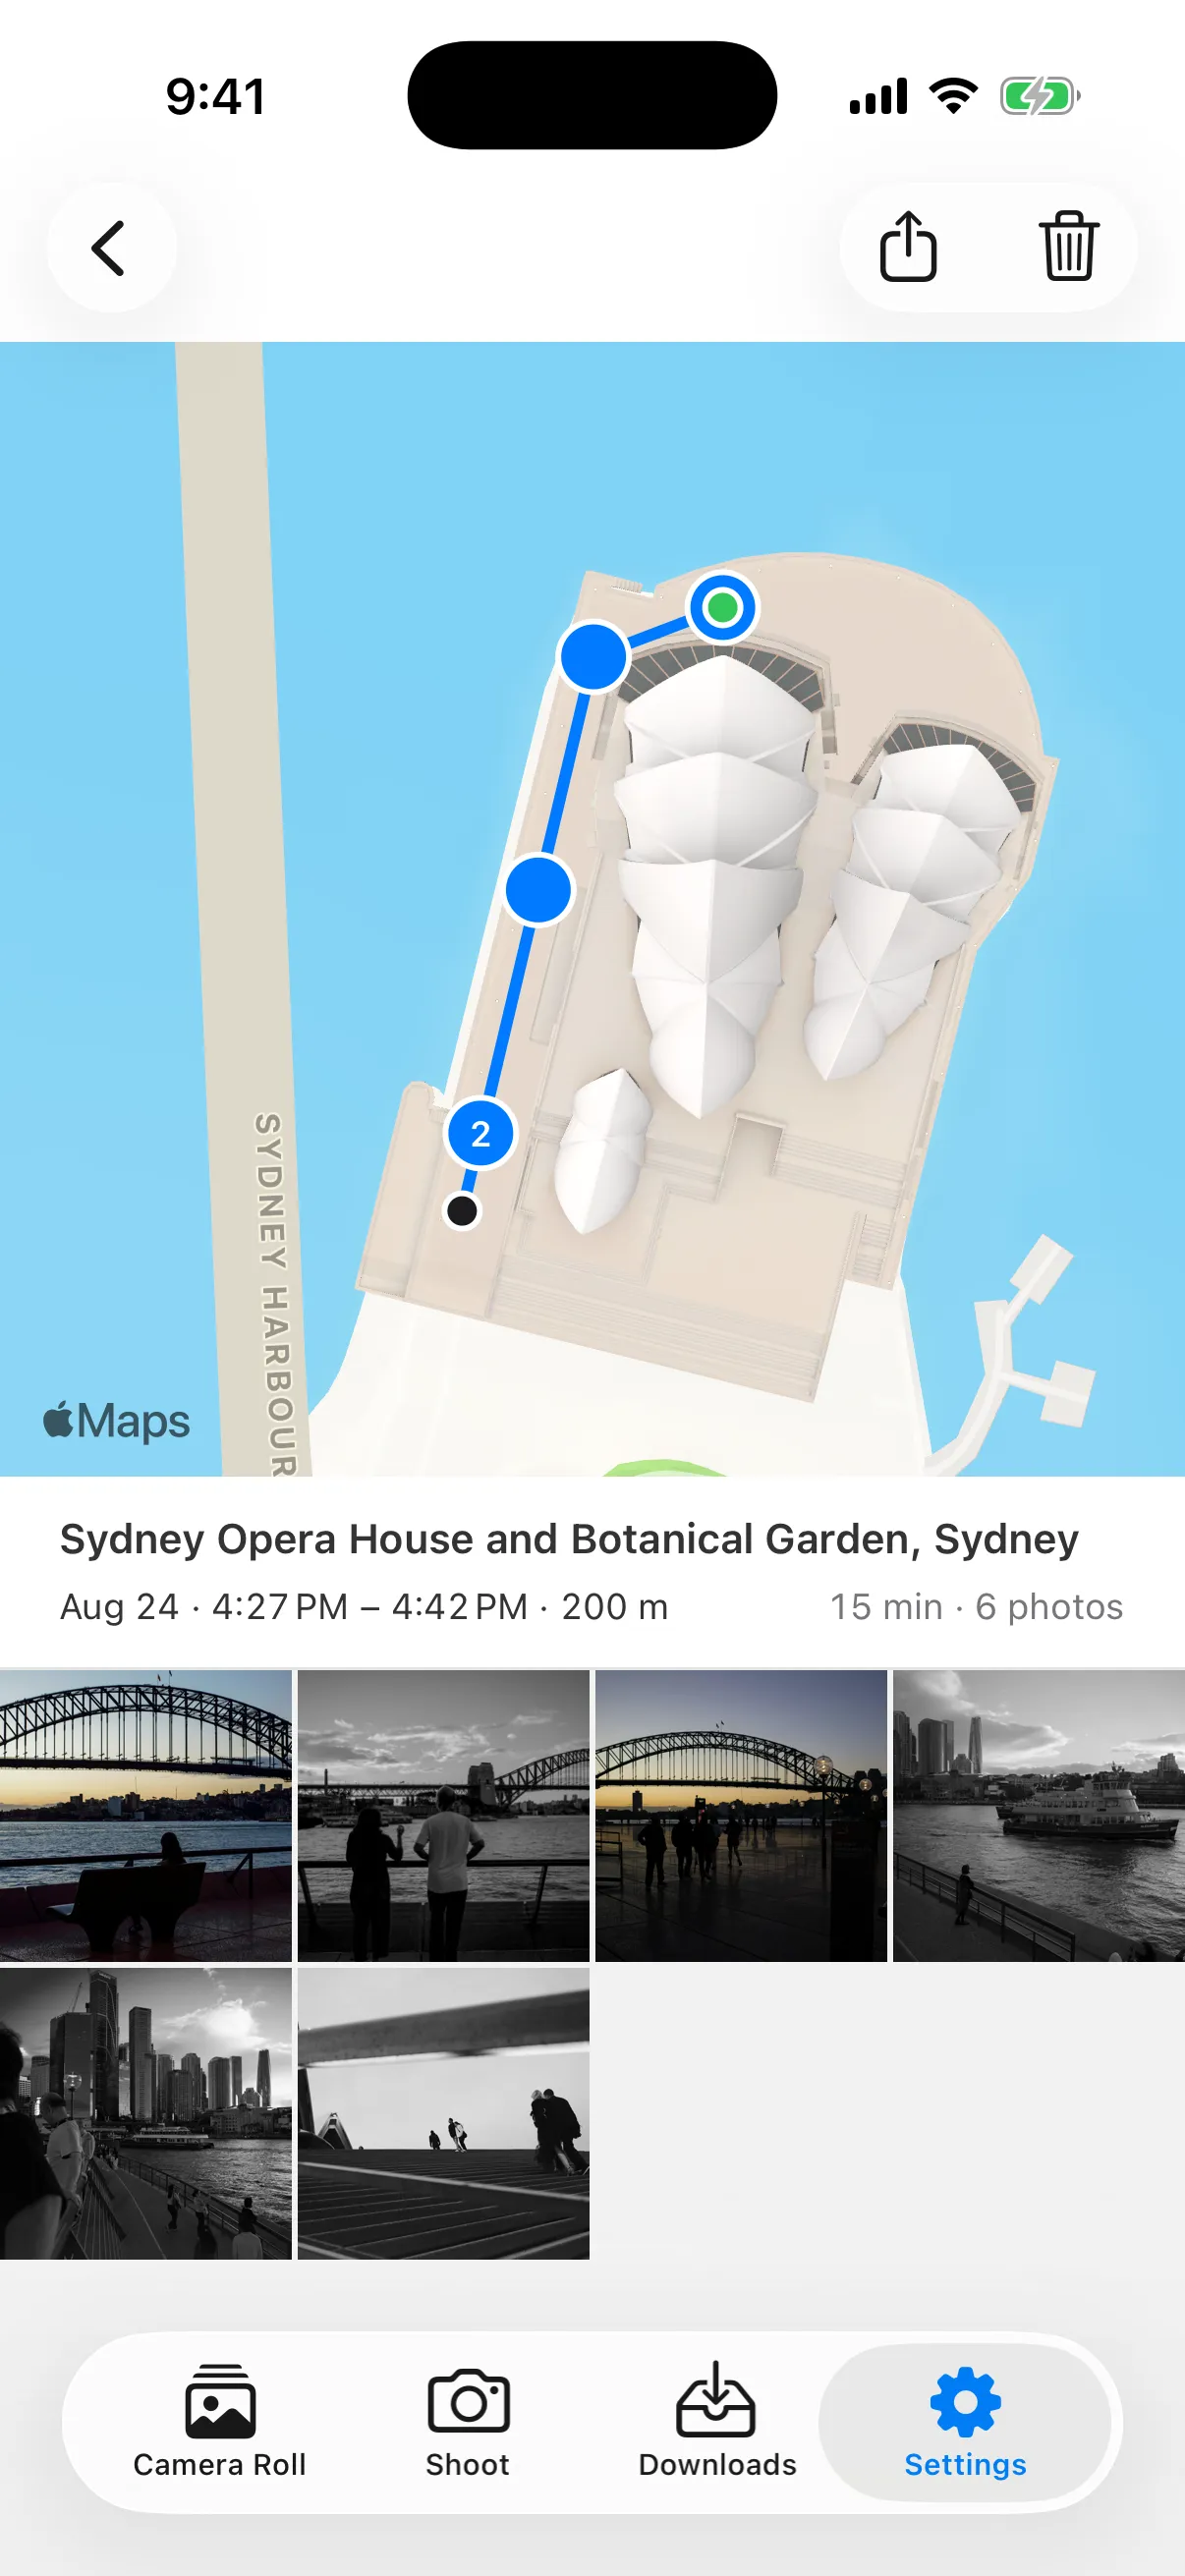
Open a photo’s info sheet to check its location, or open the route in Location History to see the matched photos on the map. Keep the route until you have downloaded and checked the photos you want to match.
Turn off Geotagging when you no longer need to record; saved routes remain available for matching later downloads.
What receives the location
Route matching supports downloaded JPEG, DNG and RAW+JPEG photos. Videos are excluded, and photos that already have a location are left as they are. It works on GR Snap’s download history, not every photo in your iPhone’s photo library.
The added location belongs to the photo’s record in GR Snap and, where permitted, its Apple Photos item. It does not rewrite GPS EXIF in the original file or modify anything on the camera’s memory card. If you need location embedded by the camera at capture time, use Bluetooth location sending instead.
A match needs a saved route covering the capture time and a readable, resolvable photo timestamp. Turning on Geotagging after a walk cannot reconstruct a route you never recorded. If a downloaded photo still has no location, check its info sheet for the missing requirement.