
Geotagging in GR Snap
On this page
GR Snap can save where you took your Ricoh GR photos. On a paired GR III, IIIx or IV, it can send your iPhone’s location to the camera while you shoot. It can also record your route and use it to add missing locations after downloading photos. The route option works with the GR II too, without Bluetooth.
This page describes the feature as it works in GR Snap 1.4 on iOS 17 or later. For the official apps, and for the camera-side checks that apply to any app, see How to geotag Ricoh GR photos.
Turning it on
- Connect the camera in GR Snap at least once, so the app knows which model it is talking to.
- Open Settings, then Geotagging, and turn the switch on. The first time, the app walks through what it is about to ask iOS for before the system prompt appears.
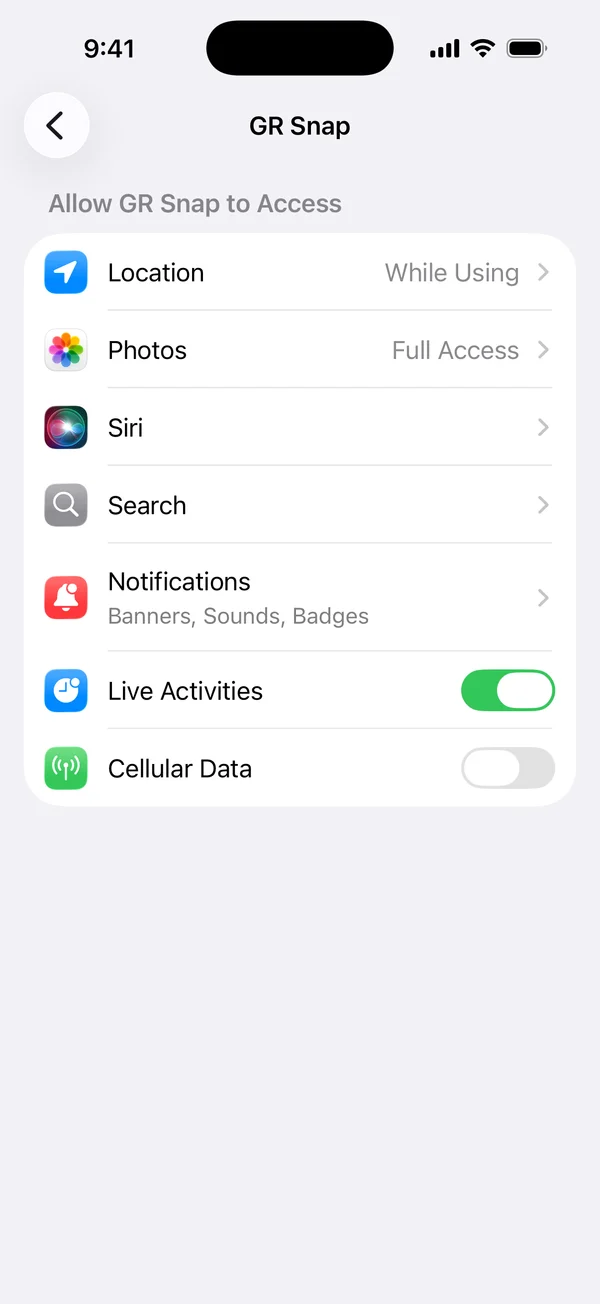
- Allow location access when asked. While Using the App lets you start recording; an active recording can continue after switching apps or locking the phone. Always also supports automatic recovery in the background. Turn on Precise Location for a more accurate route. Open Location Access to check your current permission or change it in iOS Settings. Reception and iOS can affect recording, so check the status before a walk.
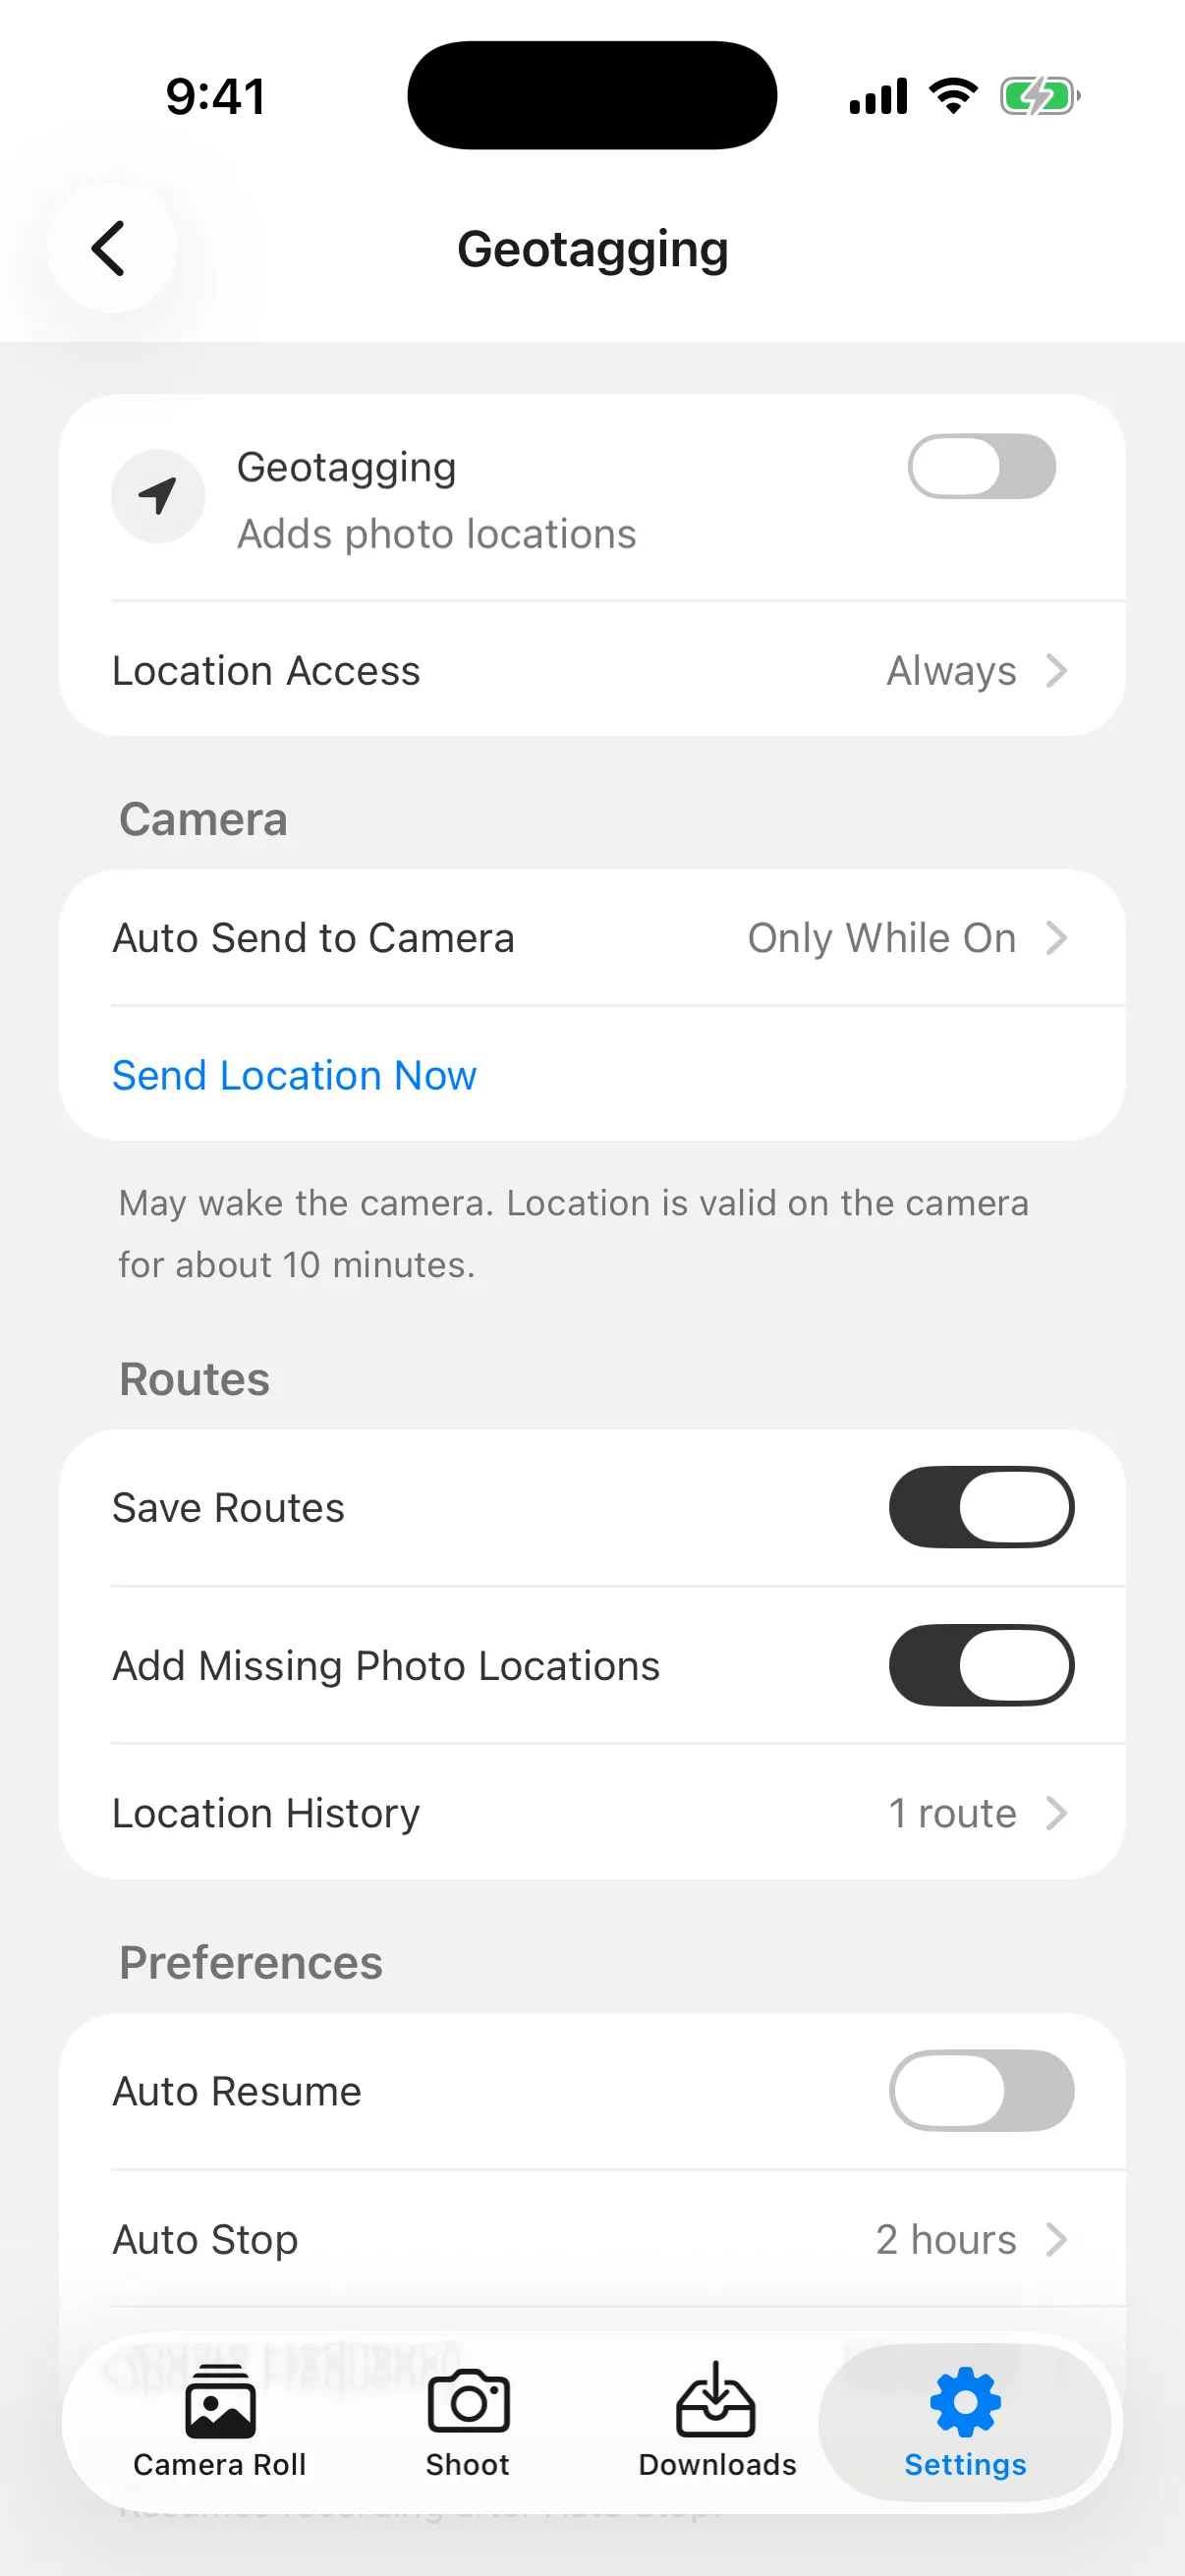
Once it is on, the Geotagging row on the Settings screen shows what the app is doing: recording, paused, waiting for the camera, or off.
Sending location to the camera while you shoot
This needs a GR III, IIIx or IV paired over Bluetooth. Under Camera, Auto Send to Camera decides when the app talks to the camera:
- Always delivers a position whenever the camera is reachable, which can wake a camera that has powered itself off.
- Only While On waits until the camera is already on, then sends. This is the default.
- Never records the route without automatic camera updates. You can still send a location manually.
Send Location Now, under the same group, pushes a single position by hand whatever the setting, and is the quickest way to check that the link works: take a photo right after, then look at its location in the photo’s info sheet.
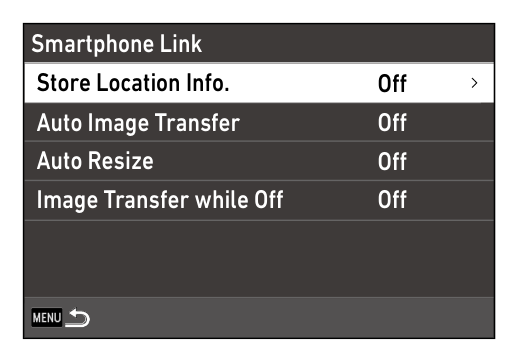
The camera writes the location itself, so it has to have its own location setting on. GR Snap turns that on for you the first time it sends (on the GR III / IIIx it is Smartphone Link, then Store Location Info., in the E6 menu) and never turns it off again.
Recording a route and adding locations afterwards
To record routes without automatically sending locations to the camera, follow Geotag Ricoh GR photos without Bluetooth location syncing. The guide explains how to set Auto Send to Camera to Never and add missing locations after downloading your photos.
This works on every model and needs no Bluetooth link at all. Under Routes, two switches control it:
- Save Routes keeps the recorded route on the phone. It cannot be turned off while Auto Send to Camera is set to Never, because then the route is the whole feature.
- Add Missing Photo Locations matches downloaded photos to the saved routes.
Before a walk, set the camera’s clock to match the phone; the match is done by capture time, and a clock that is off by an hour puts the photo an hour down the road. Then carry the iPhone with you and shoot as usual.
When you later download the photos, every JPEG, DNG or RAW+JPEG that arrives without a location is looked up against the routes recorded around its capture time. A match is written to the photo in GR Snap’s Library and, when Photos access allows editing that item, to the copy in Apple Photos. Videos are not matched, the original photo file stays unchanged, and the file on the camera’s card is never touched. A photo that already carries a location is left alone.
The look-up also runs over photos already in the Library, so turning the feature on after a trip still fills in what a saved route can cover. What a match needs: a saved route that covers the capture time, a readable capture time in the photo, and a camera clock close enough to the phone’s. Where any of those is missing, the photo’s info sheet says which one.
Pausing and resuming
Auto Stop pauses recording after the selected time without camera activity or movement, depending on your camera setting. Auto Resume, on by default, can resume it when the camera is detected on or you start moving again. Movement-based recovery needs Always location access. You can also tap Resume yourself. Check the status after a restart or an interruption.
Update Frequency offers more frequent updates or lower battery use. Start with Balanced, then adjust it to suit your walks.
Location History
Location History, the last row of the Routes group, lists every saved route by month, each with a small map of the track. Open one for the full route map, the start and end place names, the date, distance, duration and the number of photos matched to it. The photos sit below the map; while the camera that recorded the route is connected, a second tab lists the photos still on its card and lets you download them from there.
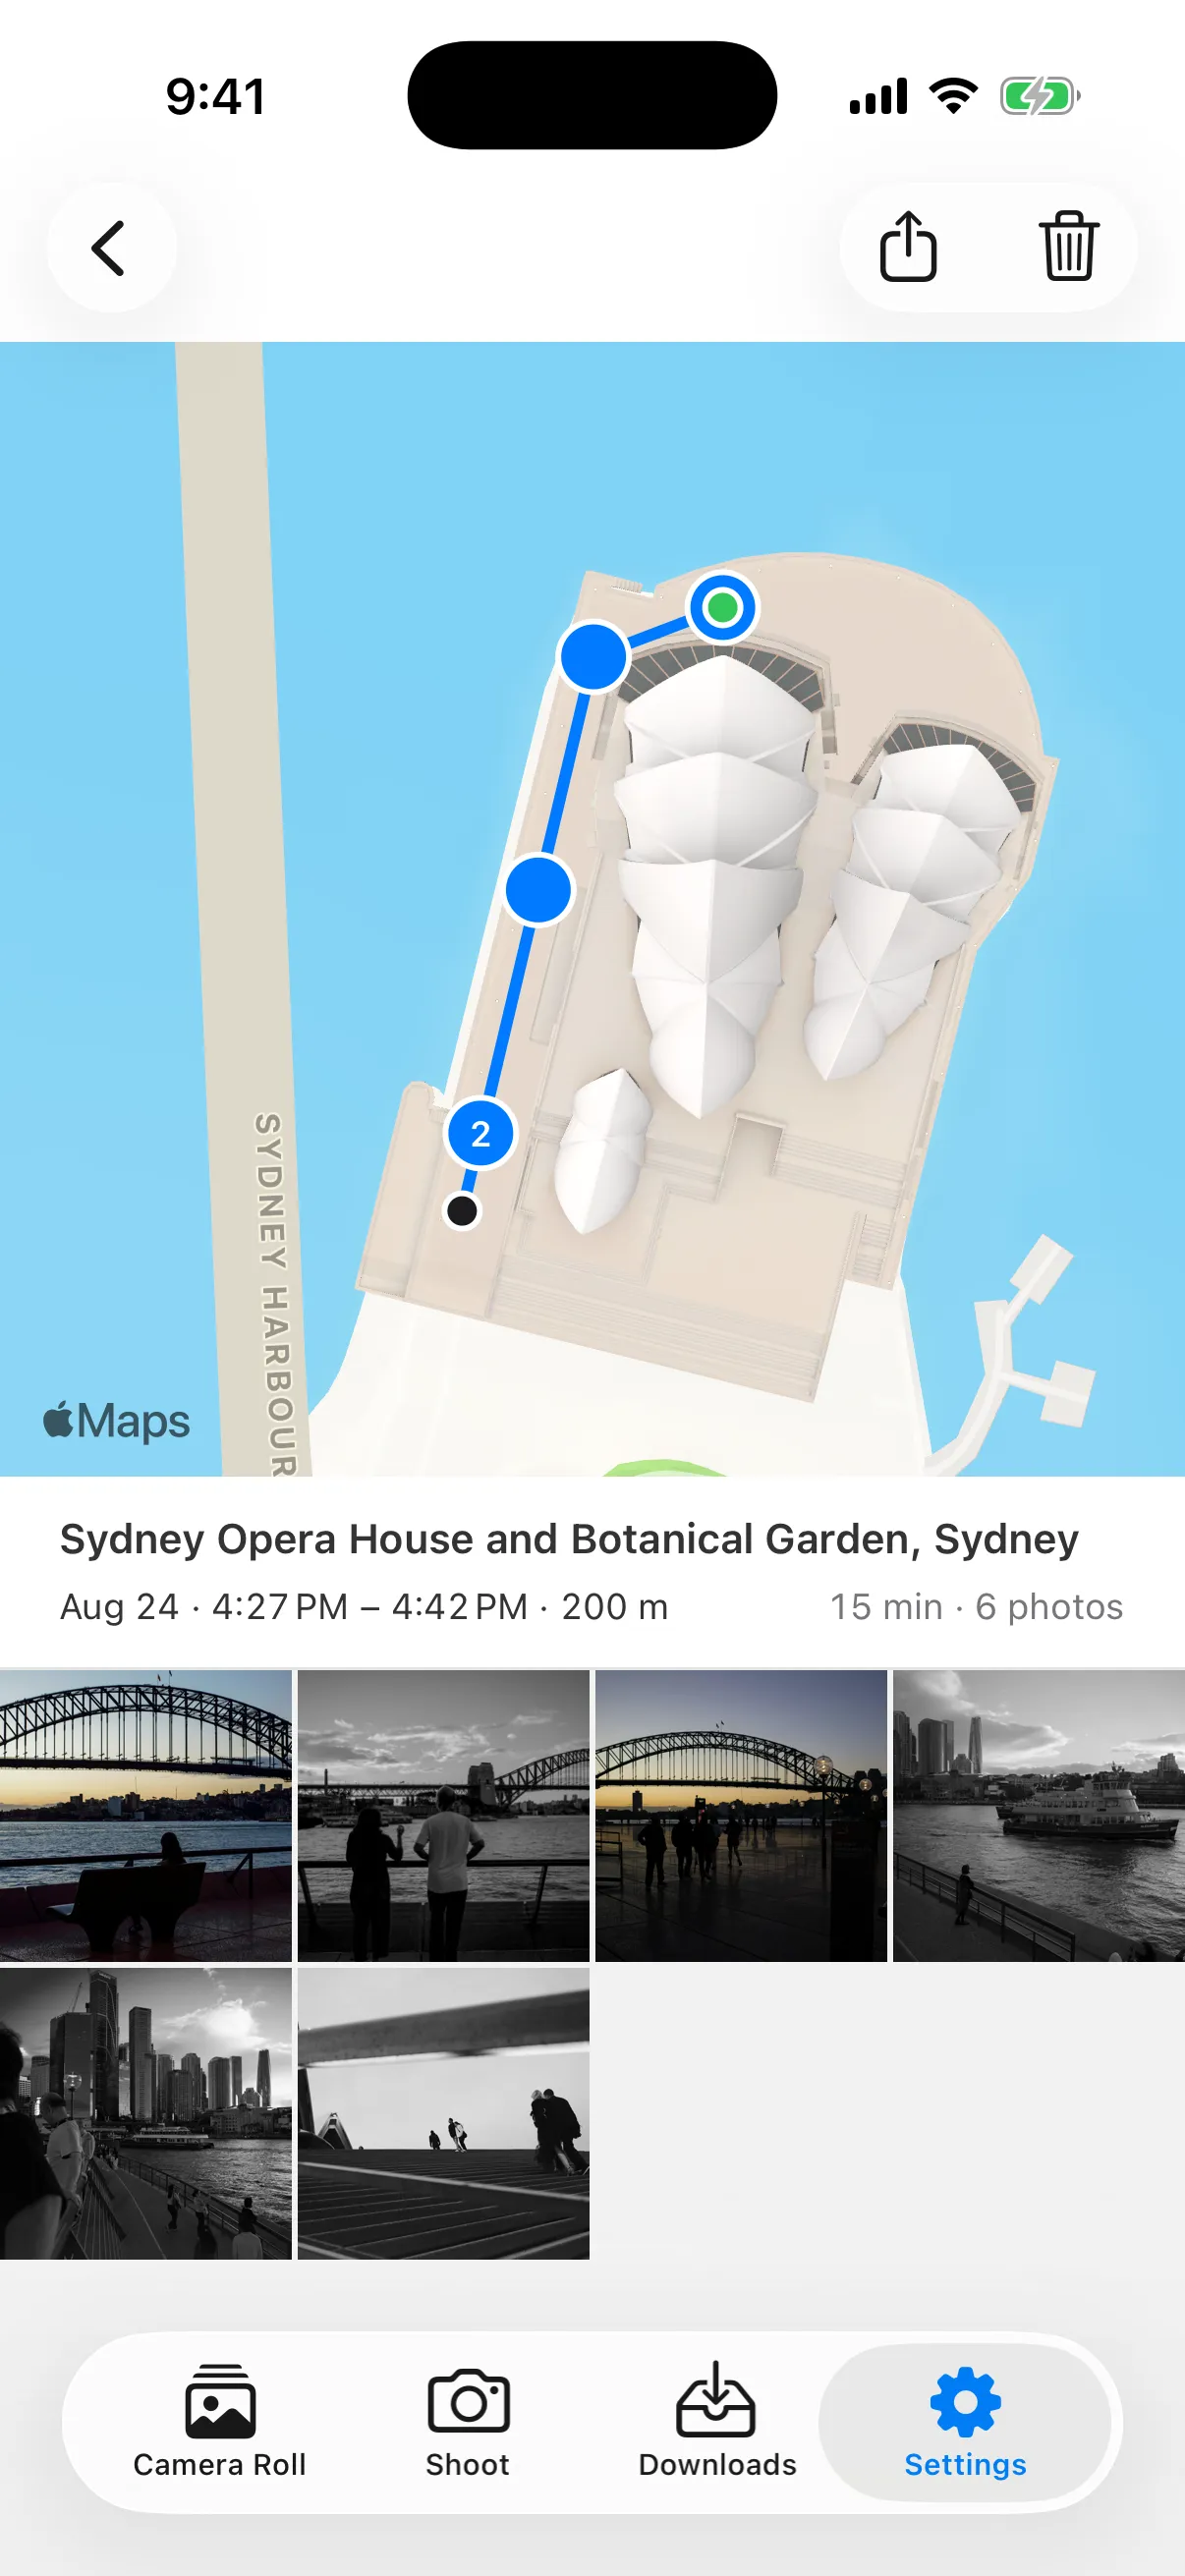
Export GPX saves a route as a file you can share, and Delete Route removes the saved route. GR Snap stores routes on this iPhone. Maps and place names use Apple services, and exporting a route or sharing a photo with a location passes that information to the destination you choose.
What it does not do
- Send a location to a GR II. The GR II has no Bluetooth; use the route instead.
- Fill in locations for videos.
- Rewrite the original file, or anything on the camera’s card.