
How to Geotag Ricoh GR Photos (and Fix GR World Location Tagging)
On this page
The GR II, GR III, GR IIIx, and GR IV have no built-in GPS receiver. There are two ways to add a location: send your phone’s position to a compatible camera while shooting, or match downloaded photos to a saved route afterwards.
For GR III / IIIx / IV, GR World, Image Sync on its supported models, and GR Snap can send location over Bluetooth. GR II has no Bluetooth: use a saved route or add locations afterwards. For GR Snap’s route workflow, start here. The checks below cover location sent to the camera; they are not prerequisites for recording a route on the phone.
1. Turn on location recording on the camera
On the GR III / IIIx / IV, open the E6 menu, then Smartphone Link, and turn on Store Location Info.
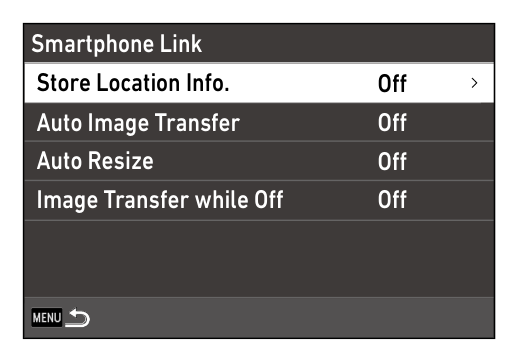
Before a walk, take a test photo and check its location. The camera’s GPS status icon helps distinguish waiting for location from receiving it; an enabled switch alone does not prove that coordinates reached the camera.
2. Check the Bluetooth link, not the Wi-Fi one
Bluetooth carries the location; Wi-Fi transfers the photos. On the GR III / IIIx, open Bluetooth Setting in the E6 menu and check that Action Mode is not set to Disable. On the GR IV, open Wireless Communication in the E6 menu and check that Action Mode is On, and turn Airplane Mode off. If photos transfer but lack GPS, verify the Bluetooth pairing separately.
3. Fix the app’s location permission on the iPhone
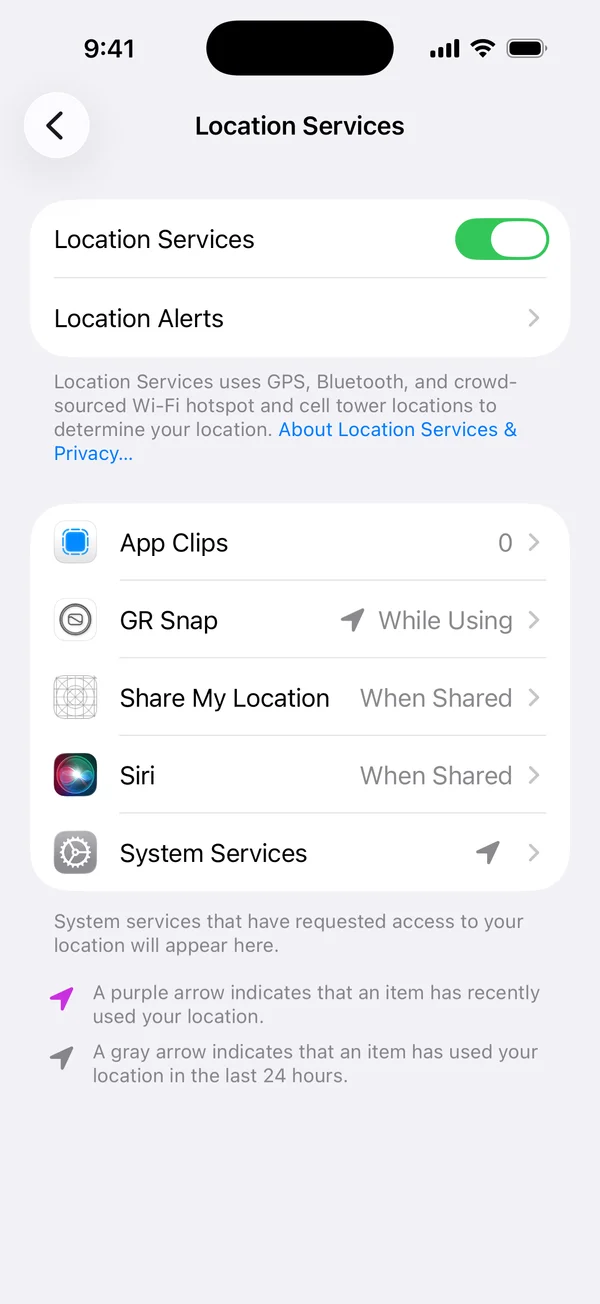
In iPhone Settings → Privacy & Security → Location Services, select the app and check its access. Enable Precise Location for a more accurate position. GR World’s instructions specify While Using the App; GR Snap shows its requirements under Location Access. Follow the app’s permission prompts rather than assuming one permission choice works for every app.
4. Turn on background location sending in the app
GR World offers Send Location Information in Background; enable it if you want location sending while using another app or locking the phone. Image Sync also supports background location sending on compatible setups: Ricoh added this for GR III in version 2.1.8 with camera firmware 1.50 or later. Keep the app and firmware current and check a test photo after locking the phone. See GR World’s FAQ and Image Sync’s release notes.
5. Check for interrupted background recording
Avoid force-quitting the app during a shoot. Background recording depends on location permission, iOS scheduling, and the app’s pause settings; it is not a guarantee of uninterrupted logging. Reopen the app after a restart or interruption and check that location updates or route recording have resumed.
6. Repair a failed camera pairing
If sending still fails with the camera nearby and awake, check pairing on both devices. In GR World, try Reconnect Settings first. If a pairing record is missing on one side, remove the remaining record and pair again following the app’s instructions. Recheck location with a new test photo.
7. If tags land but the positions look wrong
A stale phone position can place a photo behind your actual location. Move outdoors, wait for a fresh fix, and check the next frame. GR World offers High, Normal, and Low transmission frequency. For matching a saved route later, also check the camera’s date, time, and time zone before shooting.
Geotagging with GR Snap: send now or add locations later
GR Snap is our paid app. It can send your iPhone’s location to a paired GR III, IIIx or IV while you shoot, or record a route and add missing locations after downloading. Route matching also works with the GR II. It needs a saved route covering the photo’s capture time and a correctly set camera clock. Set up Geotagging in GR Snap for the steps, permissions and route controls.
Other ways to add GPS locations
- Apple Photos: select one or several photos, open the More menu, and choose Adjust Location. This works for a batch taken at the same place; see Apple’s instructions.
- Lightroom Classic: use the Map module to place a batch or match photos against a GPX track.